Starry Starry Night Mixed Media Collage - Part 2
Now that you have your photo transfer completed, or not, we can begin with background. By the way, the background can be done first, or even begun before your photo transfer has dried or been cleaned up. It really just depends on how multifunctional you are and what other things you have going on in your head.
I then centered the house, pinning it in place while I sewed it with zigzag stitch around the house edges.
After this, I cut away the excess canvas as closely as I could get to the house.
Hahahaha -- well maybe it's not funny but this project is taking so long that my girlfriend has since painted her house lol!! At this point, I must say, "done is better than perfect". So here goes the finale!
I added some red silk flowers to POP the image a bit. The piece could use a cat or butterfly for added interest, so I cut apart an old barrette, and also added a pre-made ceramic moon.
For this section, the following supplies are needed:
1) fabric scraps
2) Wunder-Under
3) thread
4) optional embellishments - beads, sequins, yarn or ribbon scraps, silk flowers,
5) optional acrylic paint
Tools:
1) iron
2) needle
3) optional sewing machine (makes project easier)
4) optional rubber stamps
Everything here is up to your discretion. So, that's either great for us "squiggles" or horrid for those "squares".
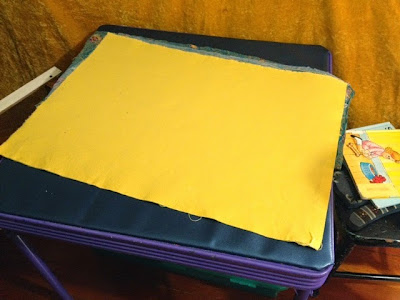
Begin by cutting out a piece of fabric for your backdrop. I am using a medium weight canvas. I know that I will be fusing minimal fabric here, so it won't get too thick but it's heavy enough to make a stable background should my friend want to frame this. I am making it, however, with the intention that it be hung from the upper edge with a dowel or stick to keep it earth-bound.
 |
| Choosing the background fabric. |
At this point you must decide if you would like to use fabric and Wunder-Under, paper and gel medium or needle to adhere it, or the rubber stamps and paint. Yes, lots and lots of artistic choices here. I have chosen a Van Gogh-ish Indian kamees that I picked up at Value World, to be the sky.
Cut out a section of Wunder-Under to fit the section of fabric you wish to fuse to the background. This stuff is tricky to work with, regardless of some YouTube video makes it look like magic. It's heat sensitive, and I do mean that. Too much heat and it will melt into your fabric and the paper backing will be a nightmare to remove, too little heat and the webbing won't adhere to your backdrop fabric. Do not use steam. I have best luck around the cotton setting (the directions on the paper-backing are vague.)
 |
| Peeling back the paper after ironing on the Wunder-Under |
Once heated and secure, peel back the wax paper. This will most like rip of in strips rather than one nice sheet. It's not a problem.
Lay your fabric with the newly bonded webbing down onto your backdrop. Again, using the iron, fuse the two together. The webbing is gooey and icky if it melts on your iron, and very difficult to remove. You may want to place a thin piece of high temp scrap fabric in between the iron and your project so any glue will adhere on that and not your iron.
 |
| Sky glued to the background canvas. |
At this stage, I decided that my background needed relief. I sloppily laid out loose threads from the floor on top of the sky area and fitted my machine with the embroidery presser foot. Making random stitches across the canvas, I secured the loose threads.
 |
| Close-up of the sky with loose threads sewn on. |
 |
| Close-up of the photo transfer sewn to the main project. |
 |
| Over-view of the project thus far. |
I was worried that the loose threads were looking very messy and well, ugly, but I didn't allow myself to criticize my work and I moved forward. I like the results. The only bad thing is that I noticed I sewed he house on crooked. It's runs slightly downhill. I will hve to trim the edges to allow the verticles to stand vertically.
From here I have to decide what I will do with the foreground. I don't want it to pop out too much, and yet I DO want some reach-out-and-touch-me-here; it needs life.
 |
| Organza and silk to be melted and manipulated with a heat gun. |
Ok, I found this green silk printed fabric and some scrap green organza. I ripped, rather than cut, each fabric so they would appear organic. I randomly sewed them together in layers and made scissor snips here and there. (Interesting tutorial HERE about surface manipulation.)
 |
| Random seams over the silk and organza. |
Then I hit it with a heat gun and melted it.
 |
| Melting the organza and silk creates a wonderful texture. Be careful not to heat too much! |
 |
| A view of the project. |
 |
| Removing stems from silk flowers. |
I added some red silk flowers to POP the image a bit. The piece could use a cat or butterfly for added interest, so I cut apart an old barrette, and also added a pre-made ceramic moon.
I added three small felt loops for hanging te piece with a wood dowel.
I finished the piece by running the edges through the serger (just prior to previous step). THE END.


OMG, it's so beautiful. Patrick is going to love this too! It will stay with us forever. Thanks so much. See you soon!
ReplyDeleteThank you :) I really thought it turned out well too, despite not having a pic of you and patrick in it!
ReplyDelete